
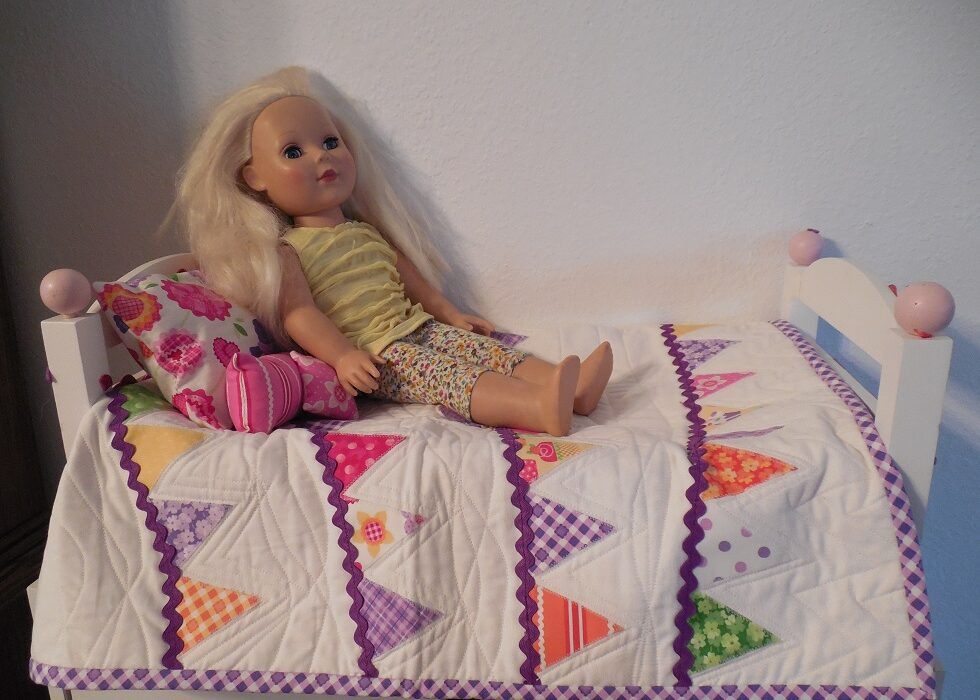
 Want to make a cute and easy American Girl doll quilt? Have some scraps you don’t want to throw away?
Junior has two 18″ dolls. I decided to make her a second doll quilt because I didn’t want them to have to share. In reality I bought way too much yardage (Sweet Things by Holly Holderman for Lakehouse Dry Goods) and I’m looking for ways to use it up. You can view the first American Girl doll quilt here.
I knew that I wanted to make a bunting quilt because they are just a fun kid-type quilt. I just wasn’t sure what size to make the triangles and geometry has never been my strong suit.
I sat down with printer paper, ruler, and a pencil until I found the measurements I needed for the scale I was after. The pennants are 2″ across the top and the sides are 2 1/2″ each.
I then drew a couple dozen triangles onto the paper side of some Heat-N-Bond. Leaving plenty of space around the tracing lines, I then cut them out.
Following the manufacturer’s directions, I applied the Heat-N-Bond to the back side of my fabric prints. Using some sharp scissors, I cut along the tracing lines. Hint: 4″ embroidery scissors are an excellent choice because they are small, pointed, and sharp.
The next thing I did was choose a piece of white-on-white fabric out of my stash.
After ironing it, I cut it down to 19″ wide by 24″ long.

Next, using a blue fabric marker, I drew random curved lines and placed my triangles along the curved lines. Using a hot iron, I adhered the triangles to the fabric and then used a narrow zig zag stitch to hold them in place permanently. As you can see, I also cut out a little bird from the main fabric and attached it.

I then used a purple ric-rack as the string of the pennants and just stitched it straight down the center of the trim.
Then it was time to layer and quilt it. Back when I learned to quilt, there wasn’t much machine quilting being done. Fast forward 25 years and hand quilters are a rarity. Progress.

Anyway, I am just learning to FMQ and my artistic creativity is being stifled by the learning curve. I did simple echo quilting around the triangles and then quilted random curvy lines to simulate a breeze blowing the pennants in the air. It didn’t take but an hour or so to quilt this little thing.
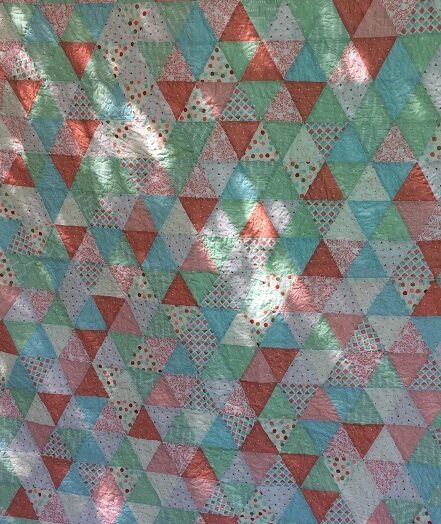
Here is a close up of the backing fabric and a peek at the quilting. 
After trimming the edges, I chose one of the coordinating fabrics for the binding and cut 2″ strips using traditional binding methods. I mitered the corners and hand-stitched the back down and voila!
What do you think? Will Ruby and Samantha be happy with this easy American Girl doll quilt? Be sure to let me know if you make one. I would love to see it!
Beth @ Cooking Up Quilts
I do think Ruby and Samantha will love their quilts! This pennant one is adorable and the quilting you did on it is perfect. So fun! Thanks for sharing on Main Crush Monday!