
Texas Quilter’s Group Quarantine Quilt Challenge
 Today is the official launch of the Quarantine Quilt Challenge, or more practically, Quilt-Along. I do hope you enjoy the blocks we have picked out for you. If you are new to the Challenge, start with our Introduction and Supplies List.
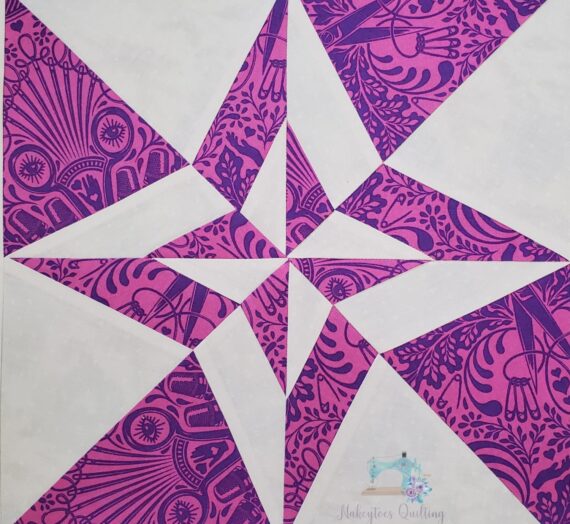
I introduce “Austin”. Since we’re all attached to Texas in some way, how fitting that we create a block named after our state capital? (Note: photo is not mine, but borrowed from Quilter’s Cache.)
Austin is a relatively simple block utilizing flying geese as the star points. Please don’t groan. Flying geese are such wonderful units to work with and add so much movement to a block.
However, these geese measure 3×6 finished, so feel free to use the 4-in-1 method found on Youtube for cutting & sewing. I use this method frequently and can make 4 perfect geese in under 15 minutes.
All information for Austin as pictured above can be found here at Quilter’s Cache. This includes cutting AND piecing directions.

Because I was going to fussy cut my focus fabric, which was just a fat quarter, I started by cutting an 8″ chunk as close to an edge as I could. Then using my 6 1/2″ ruler, I proceeded to square it up.
(NOTE: when cutting strips, be sure that you are cutting from the left (if you’re right-handed) with the ruler ON the fabric (as opposed to directly on the mat). Then make sure the measuring line of the ruler is also ON the fabric, lined up on the fabric edge, not on the line of the mat. It’s amazing what a difference those 2-3 extra threads do for a unit size.)
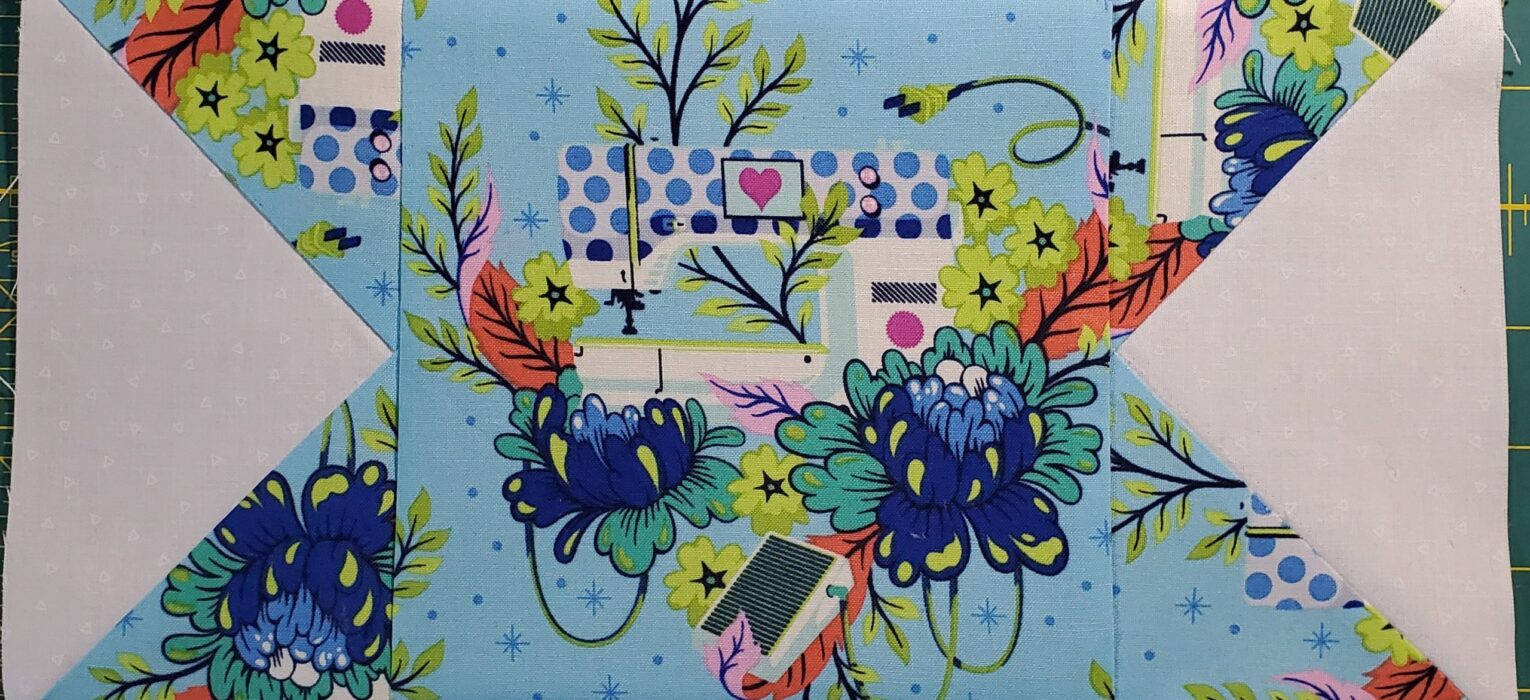
I’m delighted with how the sewing machine is showcased in this block. Super cute! (Note: I’m terrible about taking pictures as I go along. Photo is of the focus fabric in another colorway.) As I’m designing this off the cuff, I did not add a rotating mat to list of tools needed, but if you have one, it’s invaluable. I use the Matilda’s Own but have heard wonderful things about the Martelli rotating mat.

After the central square was cut, I took the remainder of the fat quarter and from it cut a 3 1/2″ strip. Four cuts at 3 1/2″ were made to create four 3 1/2″ squares. I set the remainder of the fabric aside for later use.
The next step is to cut a 3 1/2″ x 14″ strip from your Fabric 2 for the corner squares and sub-cut those into the sizes required. For me, that was the lime ruler gridwork. I was able to fussy cut the corner squares, too, and wish that the grid print came in the other colors. It was so satisfying to work with.
For the flying geese star points, you will need to cut from your background fabric a 3 1/2″ strip. From that, sub-cut four – 3 1/2″ x 6 1/2″ rectangles. Set the remainder of the strip aside for later use.
Once my pieces were cut, I laid them out on the ironing mat/TV tray combo I have next to my sewing machine. (I NEED to make one of those mini design boards that Lori Holt has directions for, so I’ll add that to my quarantine to-do list.) This way I have a visual of how the block goes together.

I followed the instructions and cutting directions implemented by the author for the flying geese side triangles. I then used the Bloc Loc trim tool to square them. Prior to sewing, I flipped the squares so I could see the backside. After determining which portion of the square was going to end up visible in the triangle, I drew a line corner to corner, then stitched just to the right of the flip line. That’s key to stitching HST’s, flying geese, or chevrons. That turn of the fold is vital for precise unit measurements.
Using the directions at Quilter’s Cache, assemble the block. Press each row as you stitch them. I alternated directions so they would nest. The top row is pressed to the lime, the center row is pressed to the square, the bottom row is pressed to the lime. Once assemble, I press both seams toward the center.
The completed block measures 12 1/2″ unfinished. I love how those polka dots balance the gridwork.

Please share your completed blocks with our readers in the comments. I can’t wait to see what all y’all’s fabric choices are!
If you belong to the Texas Quilter’s Group, be sure to post your pictures to be entered in the weekly drawing (details in the group). And if y’all post on Instagram, be sure to use the hashtags #quarantinequiltchallenge, #texasquilters, and/or #nakeytoesquilting.
Until next week, happy sewing!

Penny Grochow
I’m in!