Quarantine Quilt Challenge & Quilt Along Week 6
 Can you believe this week we are halfway through our quilt along? Where does the time go? I will say I’m getting eager for the final reveal. If you’re wanting to order your backing, the finished size will be 60″ x 74″.
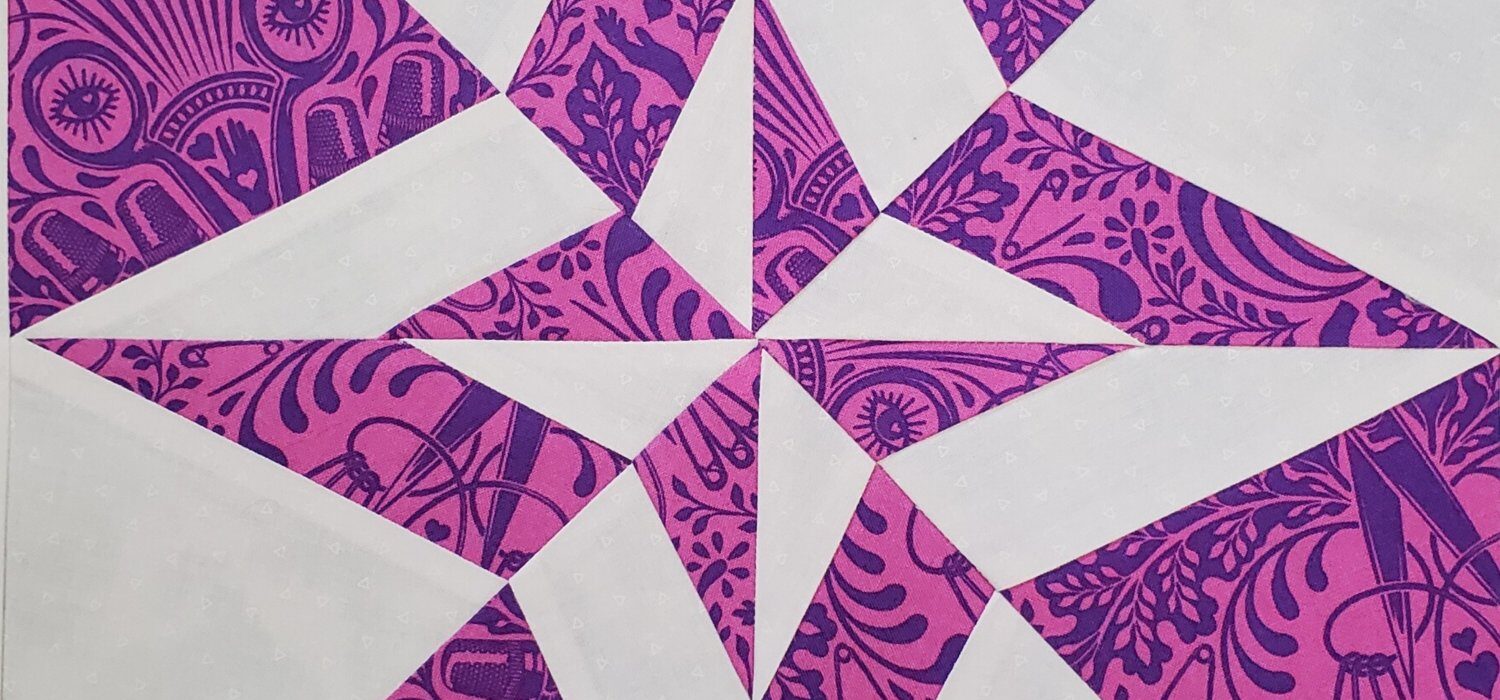
Say Hello to “Night and Day“. This is my favorite paper-pieced block of all time. It only requires two fabrics and the pattern goes together so easily for a truly awe-inspiring effect. If last week’s block was too difficult or didn’t print well for you, I urge you to give this one a try. It really does stitch up nicely.
However, if paper-piecing truly isn’t your thing, once again, we have an alternate block. Stephannie will be walking you through the steps for Rosebud lower in the post.
You can find the templates and sewing directions at Quilter’s Cache.
If you are new to the Quarantine Quilt Along, you can find the previous week’s information in the links below:
NOTES for Night & Day: you are going to need some large pieces of fabric because you are going to be working in reverse with the paper-piecing.
Be sure to measure the test square to see if your printer is accurate.
As I started to write out my notes and edit pictures, I realized that I didn’t take any pictures other than the finished block. So I decided to make a second block using random fabrics and take photos along the way.
Night and Day is pretty straight forward. Print four (4) copies of the Template, then trim down until you have 8 triangles – four in each direction.

I suggest you do each set of four at the same time to ease the strain on the brain.
Start by laying Fabric 1 print side up on the unprinted side of the template. Pin in place.

Then fold the line between 1 and 2 back to create a crease in the fabric. Release and unfold.

Lay Fabric 2 (your background) face down on top of Fabric 1 and align fabric edges beyond the crease. Pin in place if necessary. This will become your seam line.

Carefully flip the paper/fabric combo over and stitch on the solid line between 1 and 2.

Fold the paper template on the line you just sewed so that print is against print. This will expose your seam allowance. Using either your Add-A-Quarter ruler or a small ruler, trim the seam allowance to 1/4 inch. Flip fabrics open and press well.

Turn the unit around and repeat the process for sewing piece 3 onto the unit. You will need a large piece of fabric. Lay fabric piece 3 face down on top of the sewn unit, lining up the edges.

Now, fold your paper template on the printed stitch line back toward the fabric. This will crease your fabric so you can see if you have enough for a seam allowance, but it will also allow you to adjust the fabric to make sure it’s in the correct position. I’m sorry I didn’t think to use a contrasting fabric for the photos. But you should be able to see that there is adequate fabric to cover all cutting lines.

Unfold the template and pin the fabric in place. Gently turn the unit over and sew on the solid line. Flip the fabric back and trim the seam allowance.

Open the fabric and press well.

Trim the unit.

Repeat with the next 3 units for a total of 4. They should look like the following picture.

Repeat the process for the second set of templates but reverse the fabrics. When you are finished you should have four sets that look like the next picture.

Place one of each face to face and line them up. Sew each set of units together along the long diagonal until you have four squares.

Once all of the triangles are trimmed, sew them together with their opposing mate. You will then have four squares.

Continue to sew them together until you have a completed 12 1/2″ block.

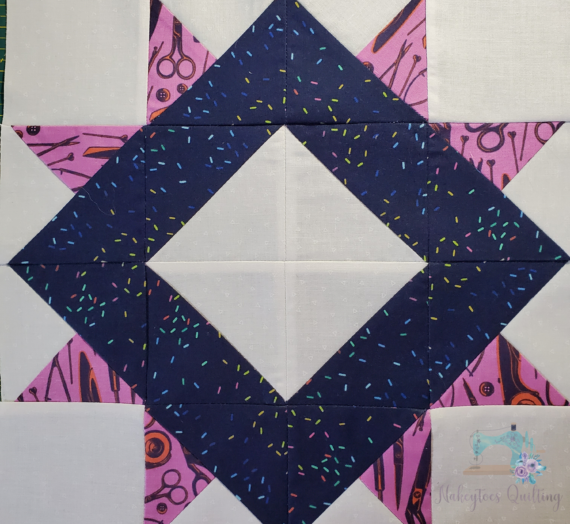
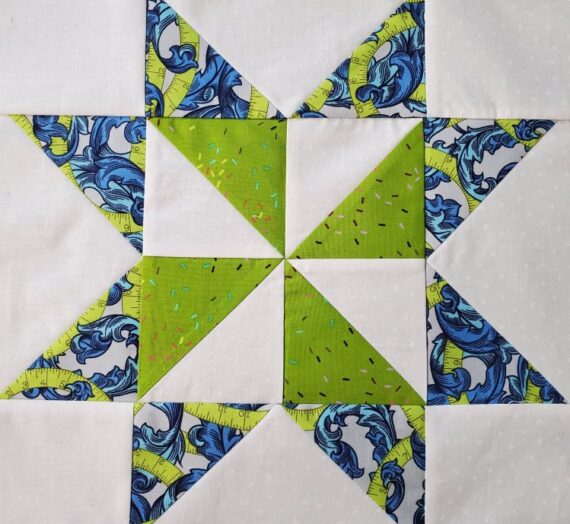
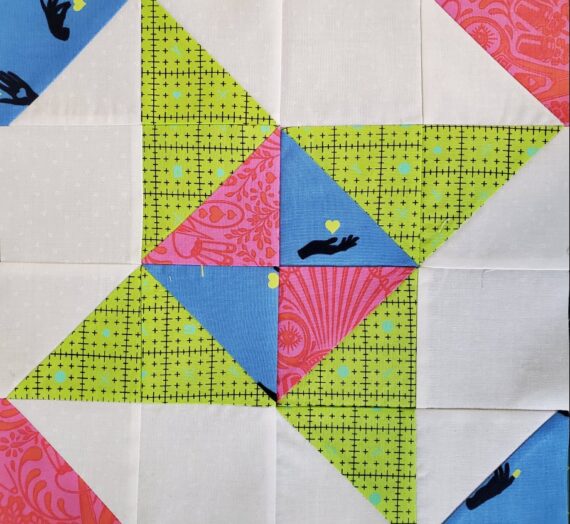
Alternate Block from Stephannie
 For those who are making the alternate block along with Stephannie, here are her directions:


In other news, I have re-discovered a type of music that I haven’t heard in a long time, and there is a YouTube group with quite the following. The group is The HU, and the form of music is Tuvan throat singing (I remember it as Mongolian throat singing when a friend in the pipe band was doing it). They teamed up with another singer by the name of Lucy Hale of Halestorm and well, it’s pretty incredible. See for yourself.
This past week has been very busy for me. Sunday I finally sat down and scheduled out my day and week and the rest of May. I haven’t been this militant about my schedule in quite some time, but I find I am so much more productive when I am able to do this. And because I was so organized this week, I have FIVE FINISHES as of this writing. By the time this post goes live, I will have finished a sixth. It’s very rainy and cold where I am, but I will be doing a photoshoot this weekend to share with y’all in the Texas Quilter’s Group.
One of the things I did Sunday when organizing my life is that I had compiled a list of projects that are in some form of progress, even if it’s just the planning stage. I took that list of projects and added a few to my weekly schedule and made yet another list of items I would need to complete certain projects.
Yesterday, I had an opportunity to go to a quilt shop and spend some quality time with the fabric. My LQS is scheduling appointments and I had a full hour to shop to my heart’s content. I took that list of needed items and whittled it down as well as picked up my BOM’s. There is nothing as sensory (sensorily???) satisfying as a quilt shop.
Today’s Amazon Item of the Day is the Self-Healing Round Rotating Rotary Turntable Green Cutting MAT (8 inches) . I purchased one of these to have next to my machine for paper-piecing. I wasn’t sure if I would like the finger grooves, but I’m finding they are a really nice feature. I have a larger’s Matilda’s Own round rotating mat, but it’s large and the space to the left of my machine is limited. The Rezy version is perfect for the space I have.

I’ve had more time for listening pleasure this week, too, because I scheduled my evenings for handwork. I’ve spent the evenings working on either an ages-old Cross-Stitch project and finishing up the binding on my Hurricane quilt. The Audible pick I’m currently listening to is “The Wrong Side of Goodbye” by Michael Connelly.
And I’m also binging Small Town Murder. This one isn’t for the faint-hearted or those with delicate sensibilities. It’s graphic, uncouth, and cringe-worthy, but absolutely hilarious. I often have to stop sewing because I’m laughing so hard. James does an amazing amount of research and I love, love, love the information on the small towns of America. I’m actually using this pod as a way to vett the areas where I’d be interested in moving.
Have a very blessed week and we’ll see you again next Friday. If you’re in the Texas Quilter’s Group, be sure to share your blocks with the rest of us. If you’re on Instagram, use the hashtags #quarantinequiltchallenge and/or #texasquilters. And as always, if you have questions, reach out to Stephannie or me.
Blessings!
Melissa
Disclosure: This site uses links which lead to affiliate sites from which I make a (very) small commission. All comments and opinions are my own, and I refuse to promote a product that I do not like.